
Android
The Psychology of Demo Trading: How Your Virtual Results Reflect Your Real Trading Behavior

In the world of trading, the use of demo accounts has become a vital tool for both beginners and experienced traders. Platforms like Bubinga offer demo trading to allow users to practice their strategies without risking real capital. While demo trading is often seen as a risk-free opportunity to learn market dynamics, its significance extends beyond just technical practice. The way you trade on a demo account can reveal much about your real-life trading psychology, highlighting your tendencies, decision-making processes, and emotional responses.
In this article, we’ll explore how demo trading on https://bobubinga.com/demo/ Bubinga can mirror your actual trading behavior, and how understanding these psychological patterns can help you become a more disciplined and successful trader in the real market.

Demo Trading vs. Real Trading: The Psychological Connection
At first glance, demo trading might seem worlds apart from real trading. After all, no real money is at stake, which can create a sense of detachment. However, the strategies you employ, the risks you take, and how you react to gains and losses in a demo environment often reflect your underlying psychological approach to trading.
In demo trading, the absence of real financial risk can make traders more prone to taking bigger risks or trying out aggressive strategies. This can sometimes lead to success, but it’s essential to assess whether you would take the same risks with real money. Traders who find themselves too willing to take extreme risks in a demo account should consider how this mindset could affect their performance in real trading scenarios, where the fear of loss plays a much bigger role.
Even though demo trading on Bubinga doesn’t involve real financial loss, many traders still experience emotional reactions to virtual wins and losses. If a loss in a demo account frustrates you, or if a win gives you a sense of confidence, these reactions can provide valuable insights into how you might handle real money trades. Emotional control is key to trading success, and demo trading gives you a window into your ability to remain calm and objective under pressure.
One of the most important psychological aspects of trading is discipline. Demo trading provides an ideal opportunity to test whether you can stick to your trading plan or if you deviate in the heat of the moment. If you notice a tendency to overtrade, chase losses, or abandon your strategy during demo sessions, it’s likely that these behaviors will carry over to real trading unless you take conscious steps to address them.
Building Confidence Through Bubinga’s Demo Trading
- One of the key benefits of using a demo account is the ability to build confidence without financial risk. On platforms like Bubinga, traders can familiarize themselves with market movements, technical indicators, and different strategies, all while gaining valuable experience in decision-making. Confidence built during demo trading can translate into more decisive actions in real trading.
- Demo trading allows you to test various strategies without the fear of losing real money. This is crucial for learning which strategies work best in different market conditions. The confidence gained from seeing a strategy succeed on a demo account can help solidify your approach when transitioning to real trading. However, it’s essential to recognize that the emotional aspect of real trading is far more intense, and overconfidence from demo trading can sometimes lead to risky behavior in live markets.
- While it’s important to build confidence, there’s a thin line between confidence and overconfidence. In demo trading, a series of successful trades might lead to the belief that your strategy is foolproof. This can create unrealistic expectations when transitioning to real trading. It’s vital to remember that demo accounts are often free from the emotional stress of real trading, and being aware of this difference can prevent you from taking unnecessary risks in live markets.
Transitioning from Bubinga’s Demo Trading to Real Trading
The ultimate goal of demo trading on Bubinga https://bobubinga.com is to transition into live trading with the skills and psychological resilience needed to succeed. While demo trading provides a fantastic platform to develop technical skills, the real test comes when money is on the line. The psychological challenges faced during live trading can amplify emotions and behavior patterns seen during demo trading.
Understanding that your emotional state and decision-making in a demo account can differ from live trading is crucial for making a successful transition. In real trading, emotions like fear, greed, and anxiety can easily cloud judgment. Practicing mindfulness and self-awareness during demo trading can help prepare you for the psychological hurdles of real trading.
One strategy for easing into live trading from a demo account is to start small. Use the confidence and skills built during demo trading but begin with smaller positions in the live market. This approach allows you to gradually adjust to the emotional pressure of real trading without risking significant capital. As you build psychological resilience, you can increase the size of your trades.
Both during demo trading and in live markets, maintaining a trading journal can be an invaluable tool. By recording not only your trades but also your emotions and decision-making processes, you can identify patterns in your trading psychology. This reflection can help you correct bad habits and reinforce positive behaviors. For instance, if you notice that fear of losing often leads you to exit trades prematurely, you can work on building emotional control to stay disciplined.
Common Psychological Pitfalls to Watch Out for in Demo Trading
While demo trading is a fantastic learning tool, certain psychological pitfalls can limit its effectiveness. Being aware of these issues can help you get the most out of your practice sessions on Bubinga.
- One common mistake traders make is not taking demo trading seriously enough. Because there’s no real money at risk, it’s easy to fall into a mindset where you’re not as diligent with your analysis or strategy. This can lead to bad habits that carry over into real trading. Treating demo trading with the same seriousness as live trading will help you develop better discipline and habits.
- In demo trading, it’s easy to ignore risk management rules, since there’s no real consequence for losses. However, poor risk management in demo trading will almost certainly lead to problems in real trading. Use demo trading to practice setting stop losses, managing position sizes, and sticking to your risk management plan.
- Without the fear of financial loss, many traders fall into the trap of overtrading in a demo account. This behavior can lead to overconfidence and unrealistic expectations when transitioning to real trading. It’s crucial to remember that the goal of demo trading is to practice your strategy, not to win as many trades as possible.
Conclusion
Bubinga’s demo trading platform offers an invaluable opportunity to refine your strategies and gain market experience without risking real capital. However, the psychological insights gained from demo trading are just as important as the technical knowledge. The way you approach demo trading—how you handle wins, losses, risk, and discipline—can give you a clear indication of how you’ll perform in real trading environments.
By understanding the psychological connection between demo and real trading, and by using demo trading to develop emotional control and consistency, you can greatly improve your chances of success when you transition to live trading. Remember, the key to effective trading isn’t just mastering the market but also mastering yourself.

How to Create and Recover a Telegram Account: Telegram is a popular messaging platform known for its speed, security, and feature-rich experience. Setting up your account or recovering an old one is straightforward.
To create an account, download the Telegram app from the Play Store, App Store, or Telegram’s website. Open theTelegram’segister using your mobile number. After entering the number, you’ll receive an OTP (One-Tyou’llssword) via SMS, which you’ll use to verify your identity.
If you need to recover a Telegram account, ensure access to the registered mobile number. Reinstall the app and log in with your phone number. Telegram will send an OTP to the registered number, allowing you to regain access. If you’ve lost access to your nyou’venyou, recovery becomes challenging as Telegram prioritizes security.
Need access to Your Mobile Number? Steps to Recover
Losing access to your mobile number linked to your Telegram account can be challenging, but recovery may still be possible with the following steps:
- Contact Your Mobile Service Provider
- Reach out to your mobile carrier to retrieve or reactivate your old number.
- Request a replacement SIM card if the number is still available and associated with your account.
- Change Your Linked Number (If Still Logged In)
- If you’re logged into Telegram on any device, you can change your registered phone number:
- Go to Settings > Privacy and Security > Change Number.
- Could you enter your new number and verify it?
- Use Two-Step Verification Credentials
- If you’ve enabled two-step verification, you can recover your account using the password you set during setup.
- This works only if you’ve lost access to the phone number, but remember your password.
- Log in on a Device Where You’re Still Logged In
- Telegram allows multi-device login. Check if you’re logged into your account on another device.
- From there, you can update your phone number in the settings.
- Contact Telegram Support (Last Resort)
- If all else fails, contact Telegram support through their help center.
- Be prepared to provide relevant details, such as linked email addresses or backup codes, if available.
- Prevent Future Issues
- Enable two-step verification to add a password to your account.
- Regularly update your linked phone number if you switch to a new one.
While recovering your Telegram account without access to your registered number is difficult due to strict security protocols, acting promptly and following these steps can increase your chances of success.
What to Do If Telegram Fails to Send an OTP
If Telegram isn’t sending an OTP (One-Time Password) during account creation or recovery, follow these steps to resolve the issue:
- Verify the Phone Number
- Make sure the number is active and can receive SMS or calls.
- Check Network Connectivity
- Ensure your phone has a stable network connection.
- Wi-Fi to see if that resolves the issue.
- Mode on and off to refresh the network connection.
- Look for the OTP in Telegram on Other Devices
- If you’re logged into Telegram on another device, the OTP might be sent there as a message instead of via SMS.
- Open the app on other devices to check for the code.
- Wait for a Few Minutes
- Telegram might delay sending the OTP due to server issues or repeated requests. Wait for 5–10 minutes before trying again.
- Request a Voice Call
- If the SMS doesn’t arrive, Telegram may offer the option to send the OTP via an automated voice call. Listen carefully and note the code provided.
- Restart the App or Device
- Restart the Telegram app or your device to clear temporary glitches that may be blocking OTP delivery.
- Check for Carrier Restrictions
- Contact your mobile service provider to ensure there are no restrictions or issues with receiving SMS or calls on your number.
- Update Telegram App
- Update the Telegram app from the Play Store or App Store to ensure you’re using the latest version.
- Check for Blocked Numbers
- Make sure Telegram’s service numbers are correctly blocked in your phone settings.
- Contact Telegram Support
- If none of the above steps work, contact Telegram support through their help center. Provide details such as your phone number and the issue you’re facing.
By following these steps, you can resolve issues with receiving the OTP and successfully verify your Telegram account.
Read Also: How to Back Up Google Messages With Ease in 2024
Setting Up Your Telegram Profile: Tips and Tricks
A well-organized Telegram profile can enhance your experience and make communication smoother. Follow these tips to set up your profile effectively:
Choose a Recognizable Profile Picture
Use a clear and high-quality photo or logo to make it easy for others to identify you. This is especially helpful in large groups or channels.
Set a Unique Username
Find you without sharing your phone number. Usernames are case-insensitive and should reflect your identity or brand.
Write a Catchy Bio
Use the bio section to describe yourself briefly. You can share your interests, profession, or a fun fact about yourself. Keep it concise yet informative.
Enable Privacy Settings
Your profile picture, bio, and contact information. You can choose to limit this to your contacts or hide it from everyone.
Add Multiple Phone Numbers
If you use multiple numbers, Telegram allows you to link them to a single account.
Enable Two-Step Verification
Security by setting a password alongside the OTP-based login.
Customize Your Notifications
Fine-tune notifications for chats, groups, and channels to stay updated without being overwhelmed.
By following these tips, you can personalize your Telegram profile to reflect your style and enhance your messaging experience.
Recovering a Telegram Account: What You Need to Know
Losing access to your Telegram account can be frustrating, but recovery is usually straightforward if you have access to your registered mobile number. Here’s what you need to knowHere’s recovering your account:
Access to Your Registered Mobile Number
Telegram authenticates your account using your mobile number. To recover your account, ensure you still have access to the phone number linked to it.
Reinstall the Telegram App
The Telegram app on your device. Open the app and log in using your registered phone number.
Enter the OTP for Verification
Telegram will send a One-Time Password (OTP) to your registered number via SMS or Telegram on another active device. Enter this code to regain access.
What if You’ve Lost Access to Your NYou’ve
If your phone number is no longer active, contact your service provider to retrieve the number by reactivating the SIM card. With the registered number, recovery becomes easier as Telegram prioritizes security.
Enable Two-Step Verification for Future Security
After recovering your account, enable two-step verification to add a password alongside the OTP. This prevents unauthorized access even if someone else has your phone number.
Contact Telegram Support (Last Resort)
If you face persistent issues, contact Telegram support through their website. Be prepared to provide relevant details to verify your identity.
Taking precautions, such as keeping your number active and enabling two-step verification, ensures that recovering your Telegram account remains seamless.
How to Retrieve an OTP for Account Verification
Telegram uses an OTP (One-Time Password) to verify your identity when creating or recovering an account. Here’s how to retrieve your Here’ssily:
Ensure Your Phone Number is Active
Telegram sends the OTP to the mobile number you provide during account setup or recovery. Ensure the number is active and can receive SMS or calls.
Check SMS or Call for the OTP
- SMS Delivery: Telegram typically sends the OTP via SMS. Open your phone’s messaging app to finphone’sode.
- Call Option: If you are still waiting to receive the SMS, Telegdon’tight provides the option to send the OTP via an automated call. Listen carefully to the code provided.
Check Telegram on Other Devices
If you’re logged into Telegram on your preferred device, the OTP may appear as a message instead of an SMS. Open the app on your existing device to retrieve the code.
Ensure Good Network Connectivity
A weak network can delay OTP delivery. Please switch to a stronger signal or enable airplane mode for a few seconds and then turn it off to refresh connectivity.
Avoid Repeated Requests
If you repeatedly request the OTP, the system may temporarily block further attempts. To avoid delays, wait a few minutes before retrying.
Contact Your Carrier
If you don’t receive an OTP via SMS or call, contact your mobile carrier to ensure your service runs smoothly.
By following these steps, you can retrieve your OTP efficiently and complete Telegram’s verification procedure.
Frequently Asked Questions
What happens if I lose access to my phone number?
You may need to contact your mobile carrier to retrieve the number. Access to the number is necessary for recovery as Telegram prioritizes account security.
How do I secure my Telegram account to prevent loss?
To add a password layer, enable two-step verification in the settings. Keep your registered phone number active and updated.
Can I recover my chats after reinstalling Telegram?
Yes, Telegram stores your messages on its cloud servers. Once you log back in, your chats, groups, and channels will automatically be restored.
Can I change the phone number linked to my Telegram account?
Yes, Telegram allows you to change your registered phone number. Go to Settings > Privacy and Security > Change Number and follow the steps.
Can Telegram support help me recover my account?
Telegram support can assist only if you can prove ownership of the account. Recovery usually requires access to your registered phone number.
Conclusion
Creating and recovering a Telegram account is a simple and user-friendly process that ensures you stay connected while prioritizing security. Setting up a new account requires only a phone number and an OTP for verification, allowing you to quickly access Telegram’s versatile features. Telegram’ slizing your profile enhances the user experience, and enabling security options like two-step verification provides additional protection.
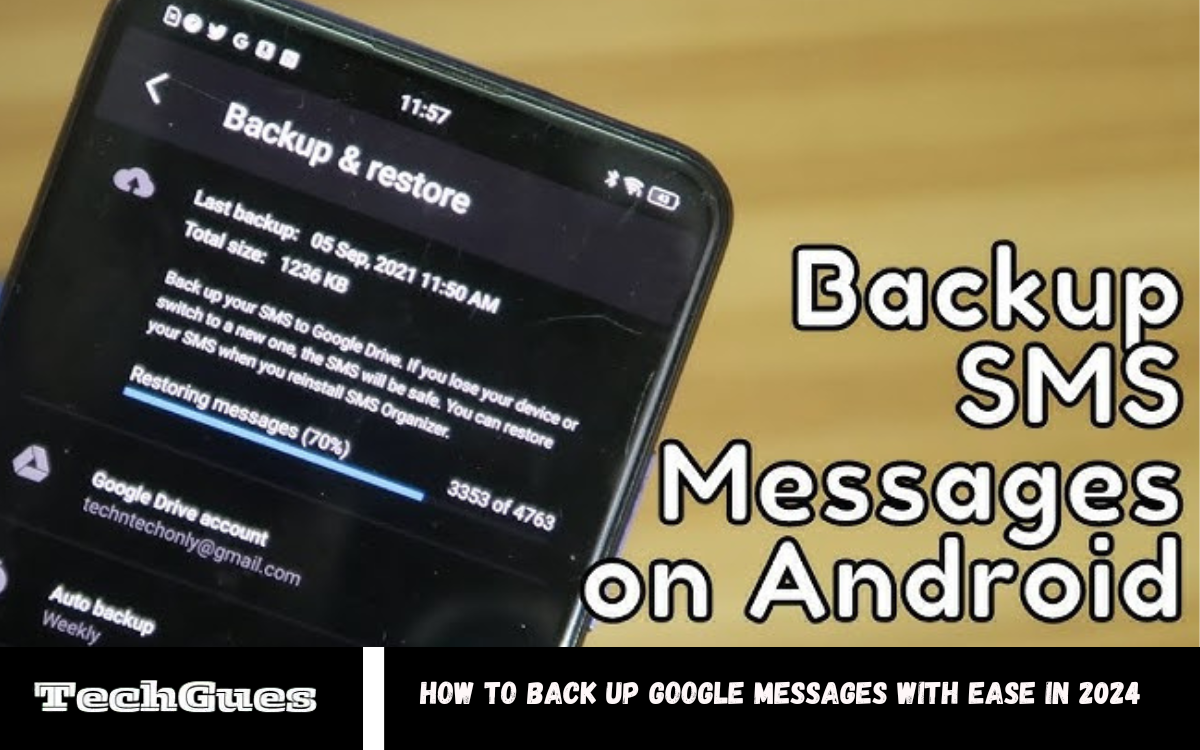
How to Back Up Google Messages With Ease in 2024: Backing up Google Messages is a vital step in preserving essential conversations, whether they are personal chats or work-related exchanges. Google Messages, an app widely used for SMS, MMS, and RCS communication, enables users to stay connected seamlessly. With the increasing reliance on digital communication, the loss of essential messages due to device damage, accidental deletion, or switching devices can be frustrating.
Thankfully, Google provides integrated backup solutions that ensure your conversations are safe and retrievable. By enabling automatic backups through your Google account, you can store your messages securely on Google Drive. This functionality not only safeguards your text history but also simplifies the process of transferring messages when upgrading to a new phone.
The backup process is user-friendly, requiring only a few steps to activate. Once enabled, your messages, including multimedia, are regularly synced to the cloud. Restoring them is equally straightforward, providing peace of mind knowing that your data is always accessible.
How Google Messages Backup Works
Google Messages backup ensures that your text messages, including SMS, MMS, and RCS chats, are securely stored in the cloud via Google Drive. This feature makes it easy to safeguard your conversations and retrieve them when switching to a new device or recovering lost data. Here’s how it works:
Integration with Google Drive
Google Messages is integrated with Google Drive, where backups are stored. Once the backup is enabled, your messages are synced to the cloud automatically.
Automatic Backup
Google Messages uses the backup settings in your Android device. If automatic backup is turned on, the system periodically syncs your messages with Google Drive without manual intervention.
Backup Content
The backup includes SMS, MMS, and RCS messages, along with associated attachments like images and videos. However, end-to-end encrypted messages are backed up only if encryption is disabled.
Restore Process
When setting up a new device, you can restore your messages by signing in with the same Google account. The system retrieves the backup from Google Drive and reinstates your chats on the new device.
Secure Storage
All backups are encrypted during transfer and stored securely in Google Drive, protecting your data from unauthorized access.
This seamless process provides peace of mind by safeguarding your valuable conversations and making them accessible whenever needed.
How to Restore Messages on a New Device
Restoring Google Messages on a new device is a straightforward process that ensures you retain meaningful conversations when switching phones. Follow these steps to recover your messages:
Verify Backup on the Old Device
- Open the Settings app on your old device.
- Go to Google > Backup.
- Ensure that the “Messages” option is included in the latest backup.
Set Up the New Device
- Connect to a Wi-Fi network and sign in with the same Google account you used on the old device.
Restore During Device Setup
- During the setup process, you’ll be prompted to restore data from a previous backup.
- Select the correct backup that includes your messages.
- Wait for the restore process to complete before proceeding.
Install the Google Messages App
- If not pre-installed, download the Google Messages app from the Google Play Store.
Check Restored Messages
- Once the restoration is complete, open Google Messages to ensure all your conversations are available.
Troubleshooting (if needed)
- If messages are missing, ensure the backup on the old device is recent and that the same account is used.
- Retry the restore process or check Google Drive for backup status.
Transition your Google Messages to your new device without losing any essential chats.
What Data is Included in Google Messages Backup?
Google Messages backup ensures your critical messaging data is stored securely in Google Drive. Here’s an overview of what is included in the backup:
SMS Messages
- All standard text messages (SMS) are included in the backup, preserving essential conversations and information.
MMS Messages
- The app also backs up multimedia messages (MMS), such as photos, videos, and audio files, sent through it.
RCS Chats
- If Rich Communication Services (RCS) chats, including advanced features like group chats, read receipts and shared files, are enabled on your device, they are backed up.
Attachments in Messages
- Attachments sent via MMS or RCS, such as Image included.
Timestamp and Metadata
- The backup retains the timestamps and metadata associated with each message, ensuring proper restoration of conversations.
Data Not Included in the Backup
- End-to-end Encrypted Messages: Messages that are end-to-end encrypted are not backed up unless encryption is disabled.
- Message Settings: Customizations like notification preferences or blocked contacts may not be restored.
- Draft Messages: Any unsent or draft messages are typically excluded from the backup.
By ensuring that this data is included, Google Messages backup allows users to restore conversations and continue messaging seamlessly on a new device.
Read Also: How to Check Notification History on Android
Best Practices for Securing Your Backup Data
Backing up your data is essential, but securing that backup is equally important to prevent unauthorized access or data loss. Follow these best practices to ensure your backup data remains safe:
Use a Strong Google Account Password
- Avoid reusing passwords from other services.
Enable Two-Factor Authentication (2FA)
- Your Google account by enabling 2FA.
- Use an authenticator app or SMS verification for added protection.
Regularly Check Backup Settings
- Ensure the backup process is enabled and running as intended.
- Verify that messages and other vital data are included in the backup.
Monitor Google Drive Usage
- Regularly review the files in your Google Drive to confirm no unauthorized changes or access.
- Keep your storage organized to identify potential anomalies.
Avoid Public Wi-Fi for Backup
- Perform backups only when connected to a secure, private network to prevent interception.
Encrypt Your Data
- Google automatically encrypts backups during transfer and storage. However, when available, ensure end-to-end encryption is enabled for sensitive chats.
Keep Your Device Secure
- To protect local data, use a strong screen lock (PIN, pattern, or biometric) on your device.
- Install updates regularly to minimize security vulnerabilities.
Periodically Review Account Activity
- Check your Google account’s Security Activity to detect unauthorized login attempts.
Limit Device Access
- Ensure only trusted devices are linked to your Google account. Remove old or unused devices promptly.
Backup Data Regularly
- Schedule regular backups to prevent data loss. Verify the backup status periodically to ensure all essential data is synced.
By implementing these best practices, you can safeguard your Google Messages backup and maintain peace of mind, knowing your data is secure.
Frequently Asked Questions
How often are backups updated?
Backups are updated automatically, typically when your device is idle, connected to Wi-Fi, and charging.
Can I view my backed-up messages in Google Drive?
No, you cannot directly view message backups in Google Drive. They are stored in a format accessible only during restoration.
What happens if I delete the backup from Google Drive?
If the backup is deleted, all messages stored in it will be permanently lost and cannot be recovered.
Do I need to pay for Google Drive storage for backups?
Google provides 15GB of free Drive storage. If your backups exceed this limit, you may need to purchase additional storage.
Can I back up Google Messages to an external storage device?
Google Messages does not support direct backup to external storage. However, third-party apps or manual export methods can help save messages to external devices.
Conclusion
Backing up Google Messages is crucial for protecting your conversations and attachments from loss caused by device damage, accidental deletion, or phone upgrades. With Google’s integration with Drive, users benefit from seamless and automated backups that securely store SMS, MMS, and RCS chats in the cloud.

How to Check Notification History on Android: Notifications are a vital feature of Android devices, helping users stay updated with calls, messages, app alerts, and system updates. However, notifications can sometimes disappear if they are dismissed accidentally, leaving users unaware of what they missed.
The notification history feature, available on most modern Android versions, serves as a log where all dismissed or cleared notifications are stored for a certain period. By enabling and accessing this feature, users can revisit alerts from messaging apps, emails, social media, and other apps, ensuring they never miss essential updates.
Accessing the notification history is straightforward and can be done through the settings menu. Depending on the device’s manufacturer or Android version, you must enable the feature manually under the “Notifications” or “Apps & Notifications” settings.
Why You Need Notification History
Notifications play a crucial role in keeping you updated with messages, emails, reminders, and app alerts. However, they can easily be dismissed accidentally or get cleared automatically, leaving you unaware of important updates. Here’s why having access to notification history is essential:
- Recover Dismissed Alerts
- Sometimes, you may swipe away a critical notification, such as a payment reminder, meeting alert, or an important message. Notification history ensures you can retrieve these alerts anytime.
- Stay Organized
- Managing multiple notifications from various apps can be overwhelming. A notification history log allows you to review alerts systematically and avoid missing anything essential.
- Track Missed Notifications
- If you’ve been away from your device or missed hearing a notification sound, the history feature provides a quick way to check what you missed without reopening every app.
- Avoid Miscommunication
- Notifications from messaging or social apps can contain crucial details. The history feature helps revisit conversations or updates that might otherwise be lost.
- Troubleshoot App Behavior
- If an app repeatedly sends alerts but they disappear, reviewing notification history can help identify the source or track unusual behavior.
Notification history is a powerful tool for enhancing productivity, avoiding confusion, and ensuring you stay connected with the updates that matter most.
Key Benefits of Using Notification History
Key Benefits of Using Notification History
- Retrieve Accidentally Dismissed Notifications
- Notification history allows you to recover alerts that were unintentionally swiped away, ensuring you don’t miss important updates like messages, reminders, or app notifications.
- Stay Informed
- If you’ve been away from your phone or missed hearing a notification sound, the history log ensures you can catch up on all alerts without needing to open individual apps.
- Improve Productivity
- By revisiting missed or cleared notifications, you can stay organized and prioritize tasks effectively, avoiding the need to rely on memory or manually search for updates.
- Track App Activity
- Notification history helps you monitor which apps send frequent alerts, enabling you to adjust notification settings and reduce unnecessary distractions.
- Resolve Miscommunications
- For messaging and social apps, the history log ensures you can review important messages or updates that might have been overlooked, reducing the risk of miscommunication.
- Debugging and Troubleshooting
- Notification history can help identify recurring app notifications or unusual behavior, helping to troubleshoot issues like app crashes or redundant alerts.
- Enhanced Convenience
- With all notifications stored in one place, you gain a centralized log that’s easy to access and manage, saving time and effort.
The notification history feature is a must-have for anyone juggling multiple apps and updates, offering greater control and peace of mind.
Read Also: Best Possible Ways to Turn Off Your Android Phone or iPhone
How to Enable Notification History on Android
Enabling notification history on Android is a simple process, but the steps may vary slightly depending on your device’s manufacturer and Android version. Follow these general instructions to activate the feature:
Open the Settings App
- Unlock your Android device and go to the Settings menu, usually represented by a gear icon.
Navigate to Notifications Settings
- Scroll down and tap on Notifications or Apps & Notifications, depending on your device.
- Find and Select “Notification History”
- In the Notifications section, look for an option labeled Notification History or Advanced Settings.
- On some devices, this may be under a submenu like Advanced or Special App Access.
Enable Notification History
- Toggle the switch to On to activate notification history.
- Once enabled, your device will start recording dismissed or cleared notifications for future reference.
Access Notification History
- To view past notifications, revisit the Notification History section in settings.
- You will see a chronological list of all recently dismissed alerts.
Note:
- This feature is available on Android 11 and newer versions.
- If your device doesn’t support built-in notification history, consider using third-party apps like Notification Log or Notisave.
By enabling this feature, you ensure no critical notifications are missed, improving your efficiency and convenience.
Best Practices for Managing Notification History
Best Practices for Managing Notification History
-
- Enable Notification History Strategically activate notification history only on devices where necessary, such as your primary phone. This minimizes clutter and ensures the feature is used effectively.
- Review Notifications Regularly. Make it a habit to check your notification history periodically to catch any missed alerts and take action promptly.
- Clear Unnecessary Notifications: Clear old or irrelevant notifications from the history log to keep it organized and reduce the chances of overlooking important alerts.
- Customize App NotificationsAdjust notification settings for apps to ensure only essential alerts are logged. Disable notifications from less important apps to avoid clutter.
- Use Filters if AvailableSome devices or third-party apps offer filtering options to organize notifications by categories like messages, social media, or system alerts. Use these features to streamline your log.
- Be mindful of privacy. If you share your device or use it in public spaces, remember that notification history may contain sensitive information. Consider locking this feature behind a PIN or password.
- Limit Third-Party App AccessIf using third-party apps for enhanced notification tracking, choose reputable ones and review their permissions to ensure they don’t compromise your data security.
- Update Your Software: Keep your Android system and apps updated to ensure the notification history feature works smoothly and benefits from the latest security patches.
- Disable Notification History When Not NeededIf you no longer require the feature or want to conserve system resources, turn off notification history to stop tracking alerts.
- Educate Yourself on App Behavior
- Understand which apps generate frequent notifications and tweak their notification priority to focus on essential alerts while minimizing distractions.
Following these best practices ensures that your notification history remains functional, secure, and clutter-free, helping you manage your alerts more effectively.
Frequently Asked Questions
What if my device doesn’t have a built-in Notification History feature?
You can use third-party apps like Notisave or Notification Log to track and manage notifications.
Is Notification History secure?
Yes, if built-in, it is secure as it’s part of the Android system. However, be cautious when using third-party apps and review their permissions.
Does Notification History impact device performance?
The feature consumes minimal resources, but frequent notifications from multiple apps may slightly affect performance on older devices.
How long are notifications stored in Notification History?
Depending on your device, notifications are typically stored for 24 hours or until the log reaches its storage limit.
Can I delete or clear Notification History?
Yes, you can clear the log manually by navigating to the Notification History section and selecting the option to clear it.
Conclusion
Notification history is a valuable feature that ensures you always take advantage of essential alerts, even if they are accidentally dismissed or cleared. By enabling and managing this feature, Android users can stay organized, productive, and informed about their notifications. It is beneficial for those juggling multiple apps and updates daily, as it provides a centralized log to conveniently revisit past alerts.

Get More Instagram Followers – 2025

RiseTop App Download-Get 10k Free Followers Instagram

Get Free Followers Famoid – Trial Service 100% FREE, Instantly

Get Likes Fans Apk Download – Free Instagram Followers Likes

Cafe Instagram Apk Download – Get 10K Free Followers

Followers Pro APK-Latest Version – Increase Free Followers On Instagram

Upzaya Apk Download-increase Instagram Free Likes Followers

14 ExtraTorrent Proxy | Unblock All Extratorrents Sites

Facebook VIP Cover Photos

Jay Bhim Bio For Instagram

How to Fix a Redgifs Not Loading Issue: A Step-by-Step Guide

Instagram Bio Marathi

क्षत्रिय Bio For Instagram in Hindi

Socialmediagirls Forums: A Great Way to Find New Friends
-
 Tech10 months ago
14 ExtraTorrent Proxy | Unblock All Extratorrents Sites
-
 Facebook Bio4 months ago
Facebook VIP Cover Photos
-
 Instagram Bio4 months ago
Jay Bhim Bio For Instagram
-
 LATEST NEWS10 months ago
How to Fix a Redgifs Not Loading Issue: A Step-by-Step Guide
-
 Instagram Bio4 months ago
Instagram Bio Marathi
-
 Instagram Bio4 months ago
क्षत्रिय Bio For Instagram in Hindi
-
 Tech4 months ago
Socialmediagirls Forums: A Great Way to Find New Friends
-

 Instagram Bio4 months ago
Islamic Bio For Instagram